Someone once said “Garlands are like necklaces for your house (or apartment)” and we couldn’t agree more! Garlands are great ways to decorate and add personality in small spaces, so without further ado, here are 15 DIY Halloween garlands to get your space ready for the spookiest time of year.
This post may contain affiliate links. If you make a purchase through one of my links, I may make a small profit at no extra cost to you. For further information, please view my policies. Thank you for your support!
1. Light up black cats
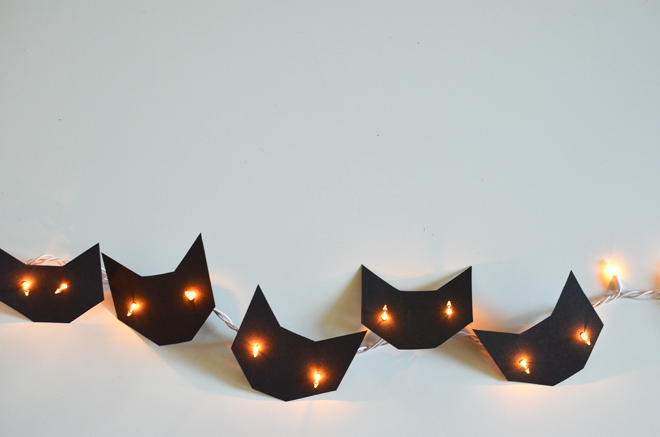
Starting off simple, here’s a tutorial for cute black cat garland! Draw and cut out cat faces from black cardstock or construction paper, making sure they’re large enough to span in between your light bulbs. Then measure the distance between bulbs and mark that on your cat faces. Next, punch holes in the cat faces and push the light bulbs through and you’re done! If you want identical cat faces, make a stencil so you can trace them all for a uniform look.
2. Halloween ornaments
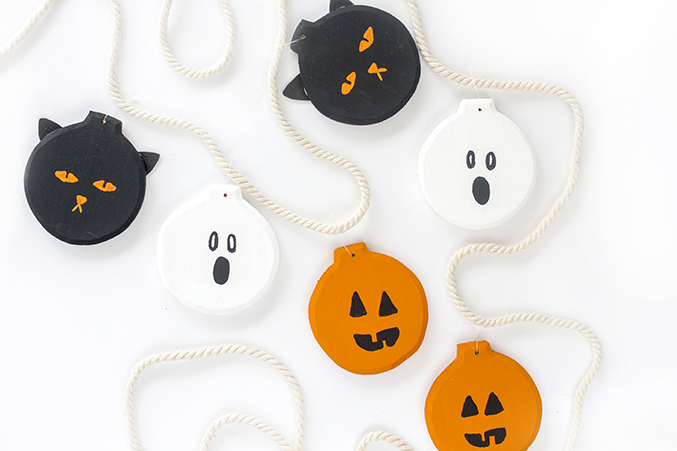
For this garland you’ll need flat wood Christmas ornaments, paint colors of your choice, paint pens, fishing line, construction paper or cardstock and glue if you want cat ears, and nautical style rope. Start by removing the original ornament hangers, usually they’re metal or twine. Then paint your ornaments, the example photo shows black cats, pumpkins, and ghosts, but the limit is only your creativity. Use the paint pens to add faces and details, then use the fishing line to create loops to hang your ornaments with. Lastly, thread them on to your nautical rope and hang!
3. Crochet ghosts
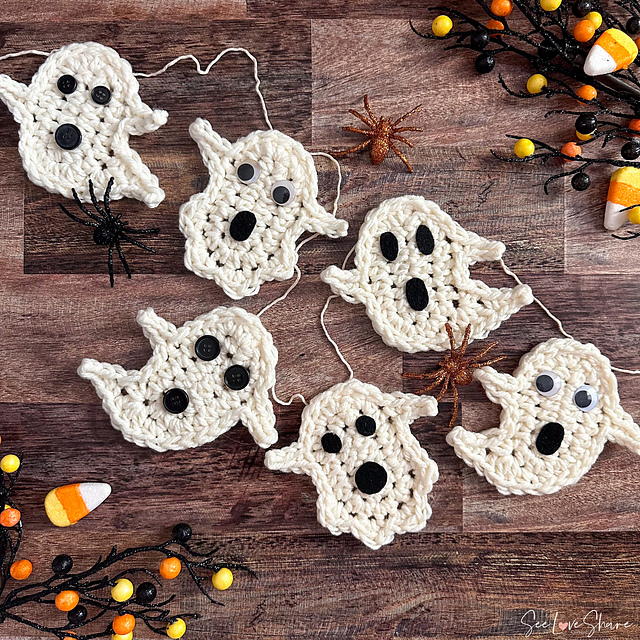
For a cute and cozy look, try crocheting these little ghosts! The pattern requires only one color of yarn, some thread to hang, googly eyes, and buttons for mouths. The pattern is available via the source link above.
4. Happy Halloween banner
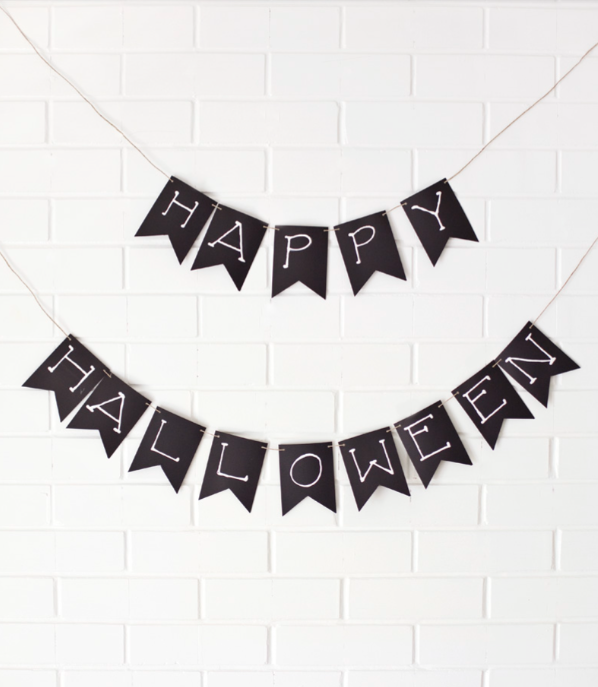
Sometimes things are classics for a reason. This black and white banner is cute, simple, and highly customizable! Create a stencil for your banner flags and cut them out of black cardstock or construction paper (or you can buy them pre-made from a craft store), then punch holes in the top to thread twine or fishing line through. You’ll want to make sure these are all the same distance from the top of the banner so they all hang straight. Next, use puffy paint or even a white out pen to write your message. Thread the flags onto the line and hang.
5. Fabric ghosts
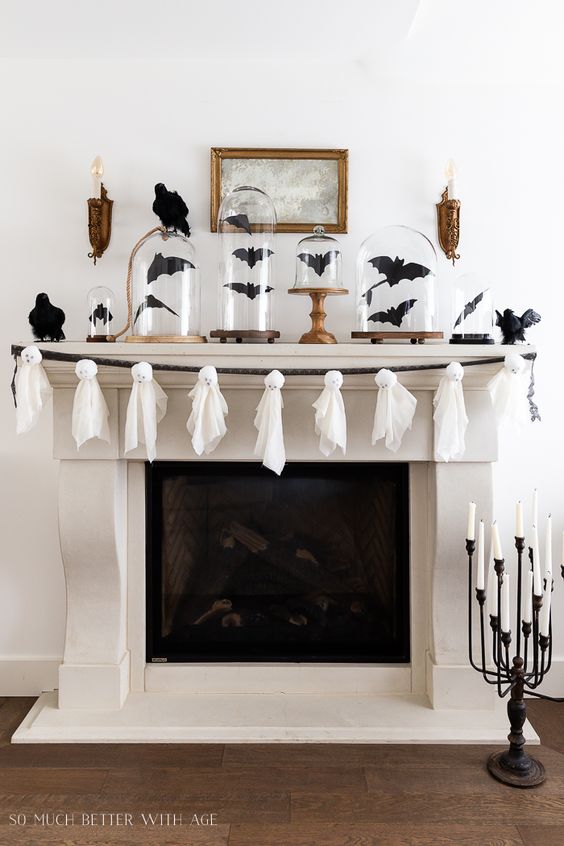
For the next of our DIY Halloween garlands, we have floating ghosts. It doesn’t get much more Halloween-y than that! Start by finding white fabric to use for your ghosts, old T shirts or cheese cloth could work for this. You’ll want them to be about 12″x12″, but they can grow or shrink depending on the size of the balls you’re using for your ghost head. For that, you can use ping pong balls, tennis balls, or whatever size styrofoam balls you like at the craft store. Place the ball in the center of the cloth and tie the fabric around it with the fishing line, ensuring that the ball is covered. Then draw faces on your ghosts and thread them on additional fishing line to hang.
6. Skulls
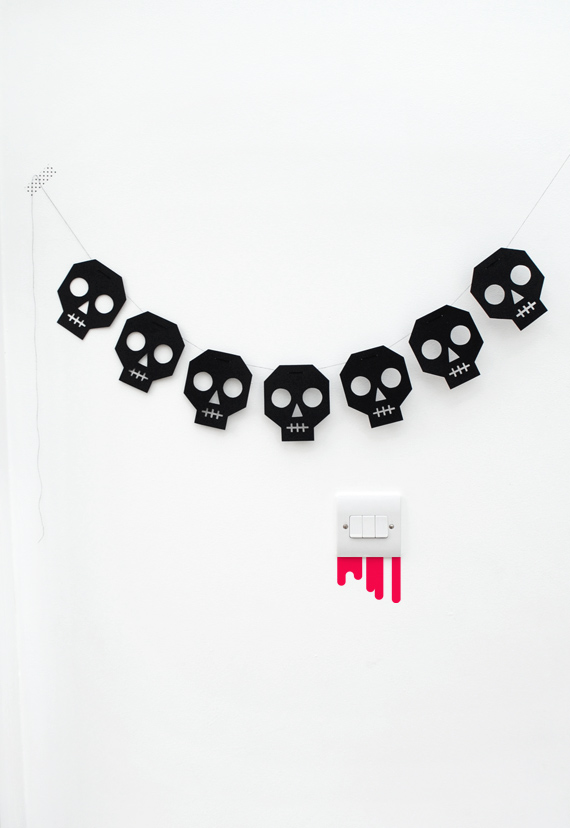
These spooky black skulls are a great craft if you have a Cricut on hand, but if not, you can still achieve a similar look using an Exact-o knife. Start by cutting the skulls out from paper of your choice, though we’d recommend something stiff so it’ll hold its shape. Then draw your faces on your skulls and cut out with your knife, be sure to use a sharp blade to keep your cuts clean. You can then tape the skulls on to your hanging string and enjoy!
7. Mini pumpkins
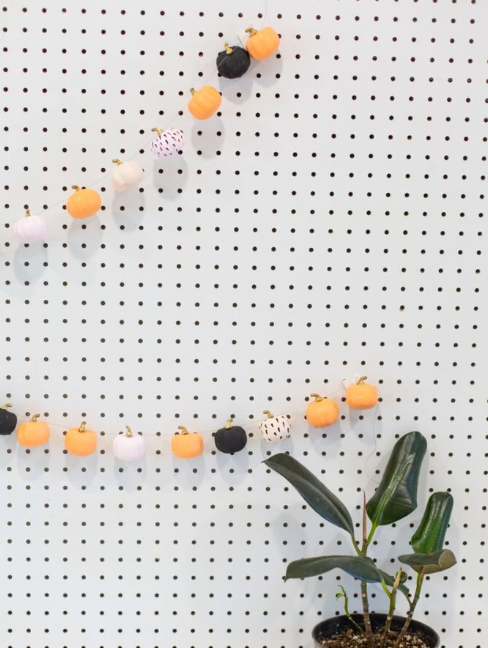
For this idea you’ll need small plastic pumpkins, paint (if desired), paint pens, and strong thread or fishing line. Start by painting your pumpkins, for a look like the photo, we’d recommend using matte or chalk paints. Then paint your stems gold or any accent color you’d like and use your paint pens to add any details to your pumpkins. When your pumpkins are dry, tie the fishing line or thread around the stems and hang.
8. Felt bats
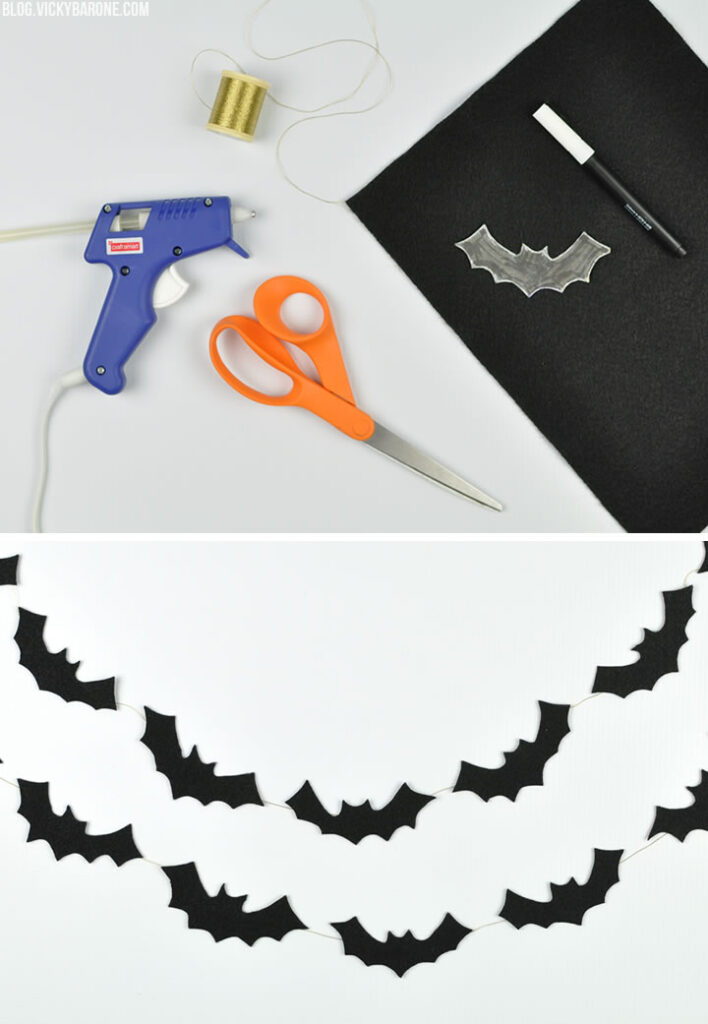
If you’ve been dying to bust out your glue gun (just like we are), this bat garland is calling your name. Draw and cut out bats from black felt and glue on to thread, twine, or fishing line! For uniform bats, make a bat stencil and trace.
9. Book ghosts
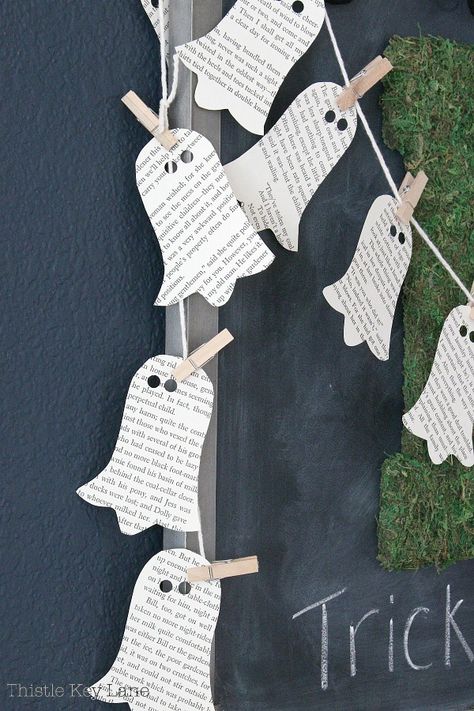
One of our favorite DIY Halloween garlands, it’s the book ghosts. We’ve previously covered it in our article 13 of the Best DIY Halloween Decor Ideas and we had to bring it back for our garland article. Get your hands on your least favorite book and cut your ghosts out of its pages. A hole puncher will help you add eyes to your ghosts. Use decorative clips to attach the ghosts to string or twine or you can simply tape or glue them.
10. Crochet pumpkins
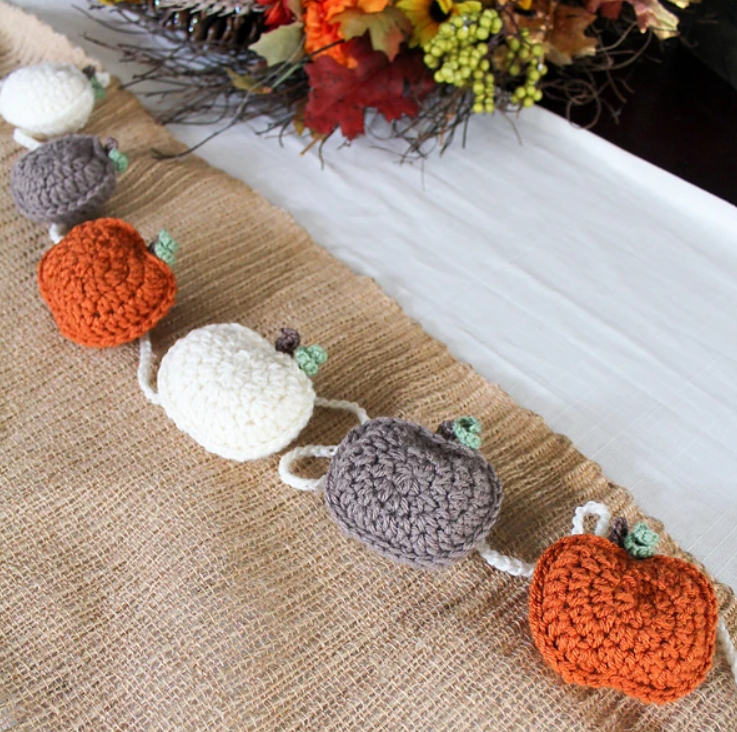
Another one for our crochet queens! If cute, plump pumpkins are a favorite of yours, the link to the pattern is above. Customize the colors you like, but this one really only needs three colors minimum.
11. Paper spider webs
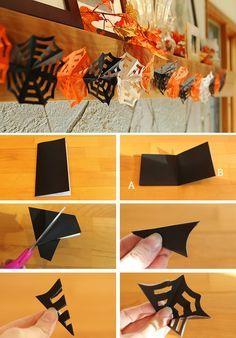
If you’re in the mood for something a little bit less cuddly, try this paper spider web garland. For this garland you’ll need origami sheets in your favorite Halloween colors, scissors, and glue or tap. Fold and cut the paper as shown to create your webs, then glue or tape them together to make your garland!
12. Candy corn
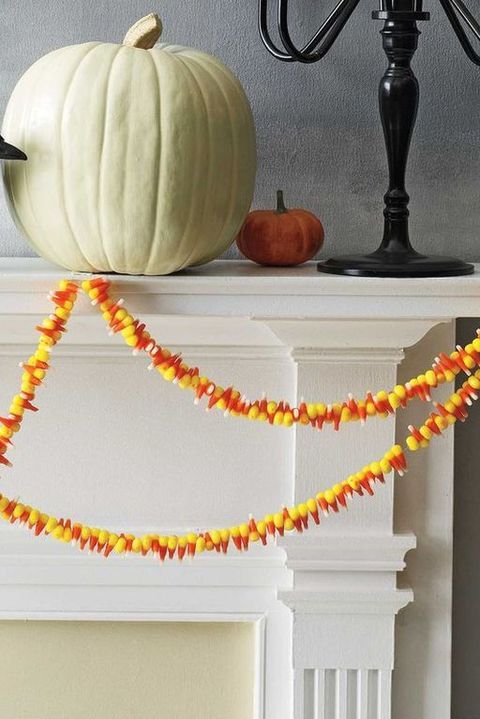
This might be the most useful candy corn has ever been. Grab a bag of this disgusting candy, thread, and a needle and begin threading the candy corn on the thread using the needle. And keep threading, and threading, and threading until you reach a length you’re happy with and knot. This garland will keep for a while, but you’ll want to be wary of mice and we wouldn’t recommend keeping it past the end of the year.
13. Black stars
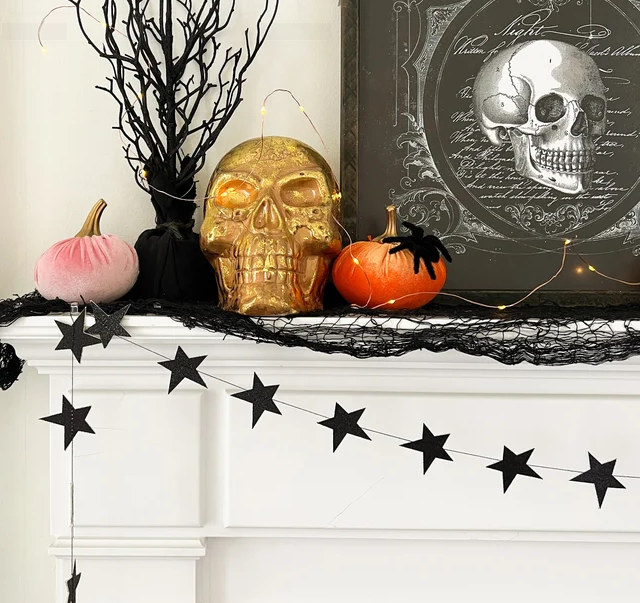
Sometimes the simplest DIY Halloween garlands are the best DIY Halloween garlands. Effective, cute, but not too cute, these black stars are a great way to add some edginess to your apartment this Halloween. Cut stars out of black cardstock and glue to black string or thread to complete the look.
14. Crochet spider web
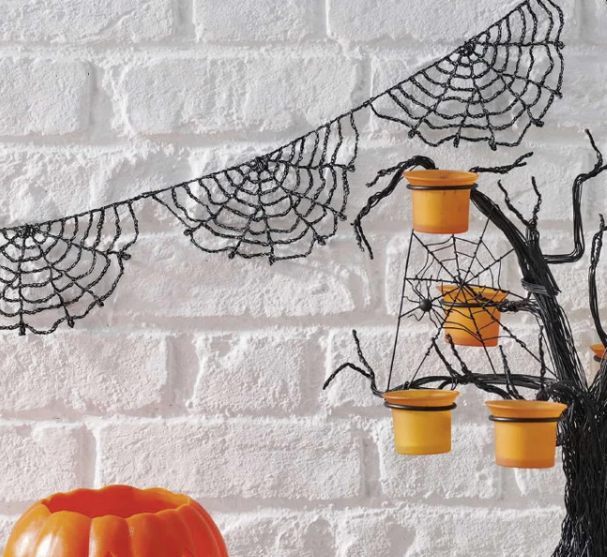
The last of our crochet offerings for our garland series, these delicate spider webs are perfect to add a subtle hint of the season to any space. The pattern is linked above if you’re interested in this timeless and effortless garland!
15. Moon phases
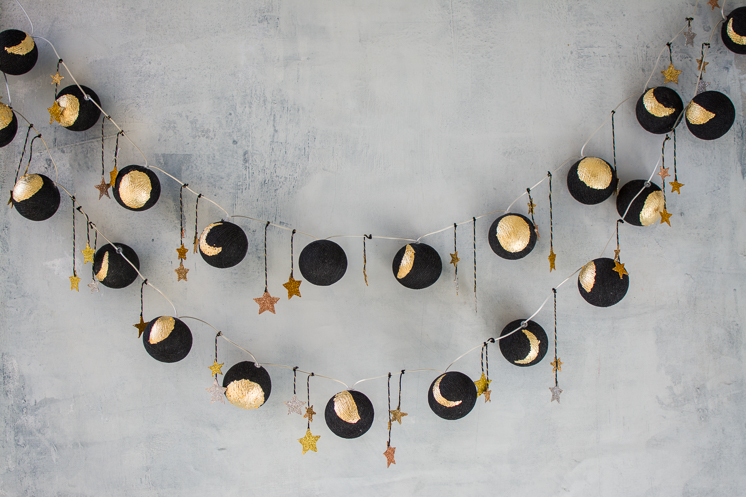
Our last garland showcases the phases of the moon for a spacy and witchy look. For this, you’ll need quite a few elements listed below:
- Charcoal Bright Lab Lights
- Gold leaf kit
- Paintbrush
- Black and gold twine
- Chipboard stars
- Glitter
- Glue
- Moon phase stencils
Use the stencils to apply gold leaf to the Bright Lab Lights, make sure to follow the application instructions for the gold leaf. Cut out stars from chipboard or buy premade ones and coat them with glue and glitter. Glue the stars to twine and tie to the strand of lights.
Related Posts:

